- There may be possibilities related to printing settings and environmental factors. Please check the following.


If you encounter such a phenomenon, please check the corresponding troubleshooting methods based on the following possible causes.
| Symptoms | Cause | Checkpoints |
|---|---|---|
| Ink splatters on the print result | Possibility of defective firing and factors around the printhead. | Check “Corrective action 1” |
| Factors related to media thickness and head gap settings. | Check “Corrective action 2” | |
| Printing on media with height differences. | Check “Corrective action 3” | |
| Influence of static electricity. | Check “Corrective action 4” |
Corrective action 1
It is possible that ink is spattering due to firing defects such as deflection.
Furthermore, there is a possibility that it is affected by fine dust or other contaminants around the printhead.
Perform cleaning, nozzle wash, and cleaning around the printhead.
Please refer to the "Operation Manual" for the procedure of nozzle wash.
Please check "Chapter 4 Maintenance" > "Nozzle Wash" for detailed instructions.
Please also try directly wiping the head nozzles.
"UJF-MkII(e) Head nozzle surface maintenance".
Corrective action 2
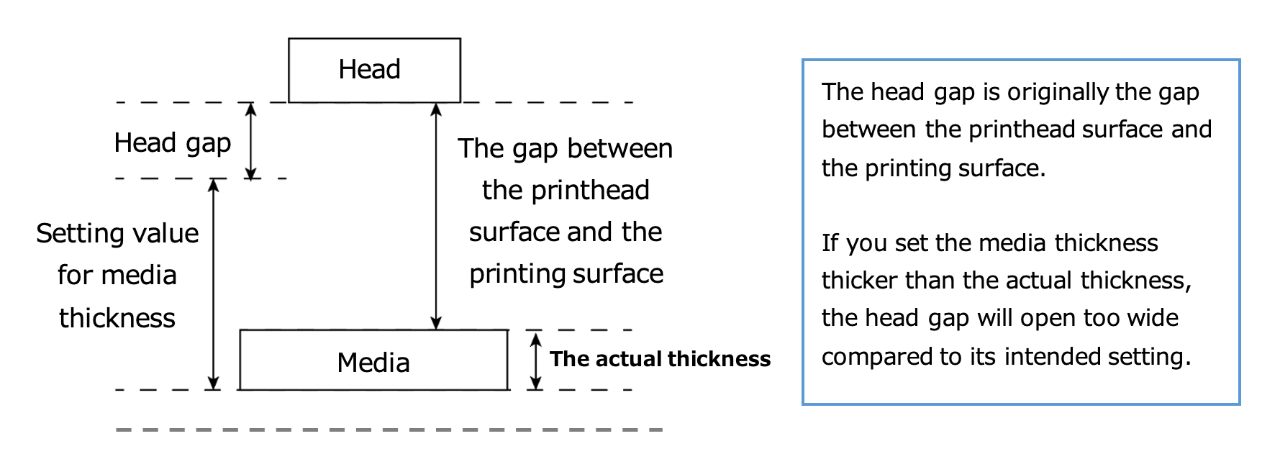
Is the set media thickness thicker than the actual thickness of the media being printed?
Setting the media thickness too thick can cause excessive gap between the printhead surface and the printing surface, resulting in ink spattering.
Also, when the head gap setting value becomes larger, it tends to create a longer gap between the media and the head surface, making ink spattering more likely.

To set the media thickness, press the FUNC1 key [MENU] and go to [HEAD HEIGHT] > [MEDIA THICKNESS].

Set the media thickness to match the actual thickness of the media being printed and try printing.
To set the head gap, press the FUNC1 key [MENU] and go to [HEAD HEIGHT] > [HEAD GAP].

Set the head gap to 1.5mm (recommended value) and try printing.
Corrective action 3
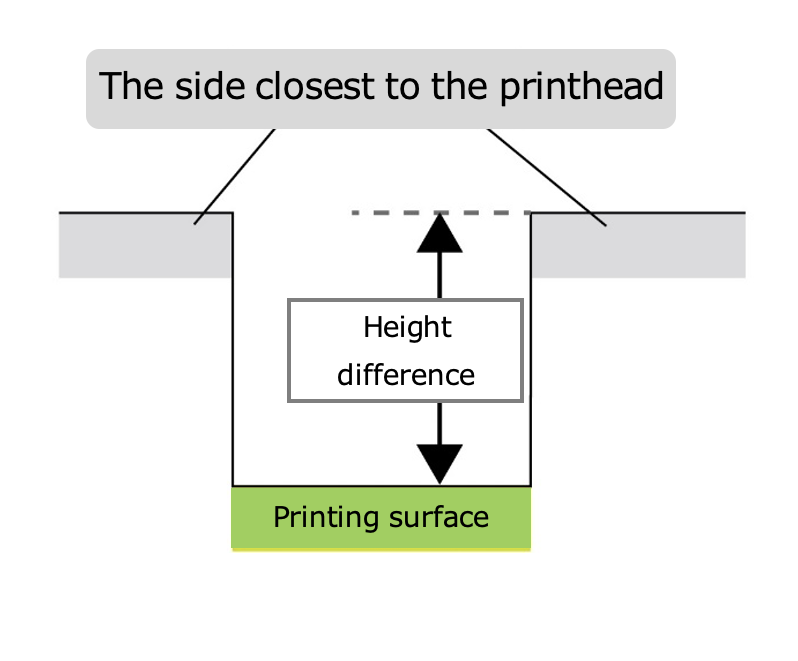
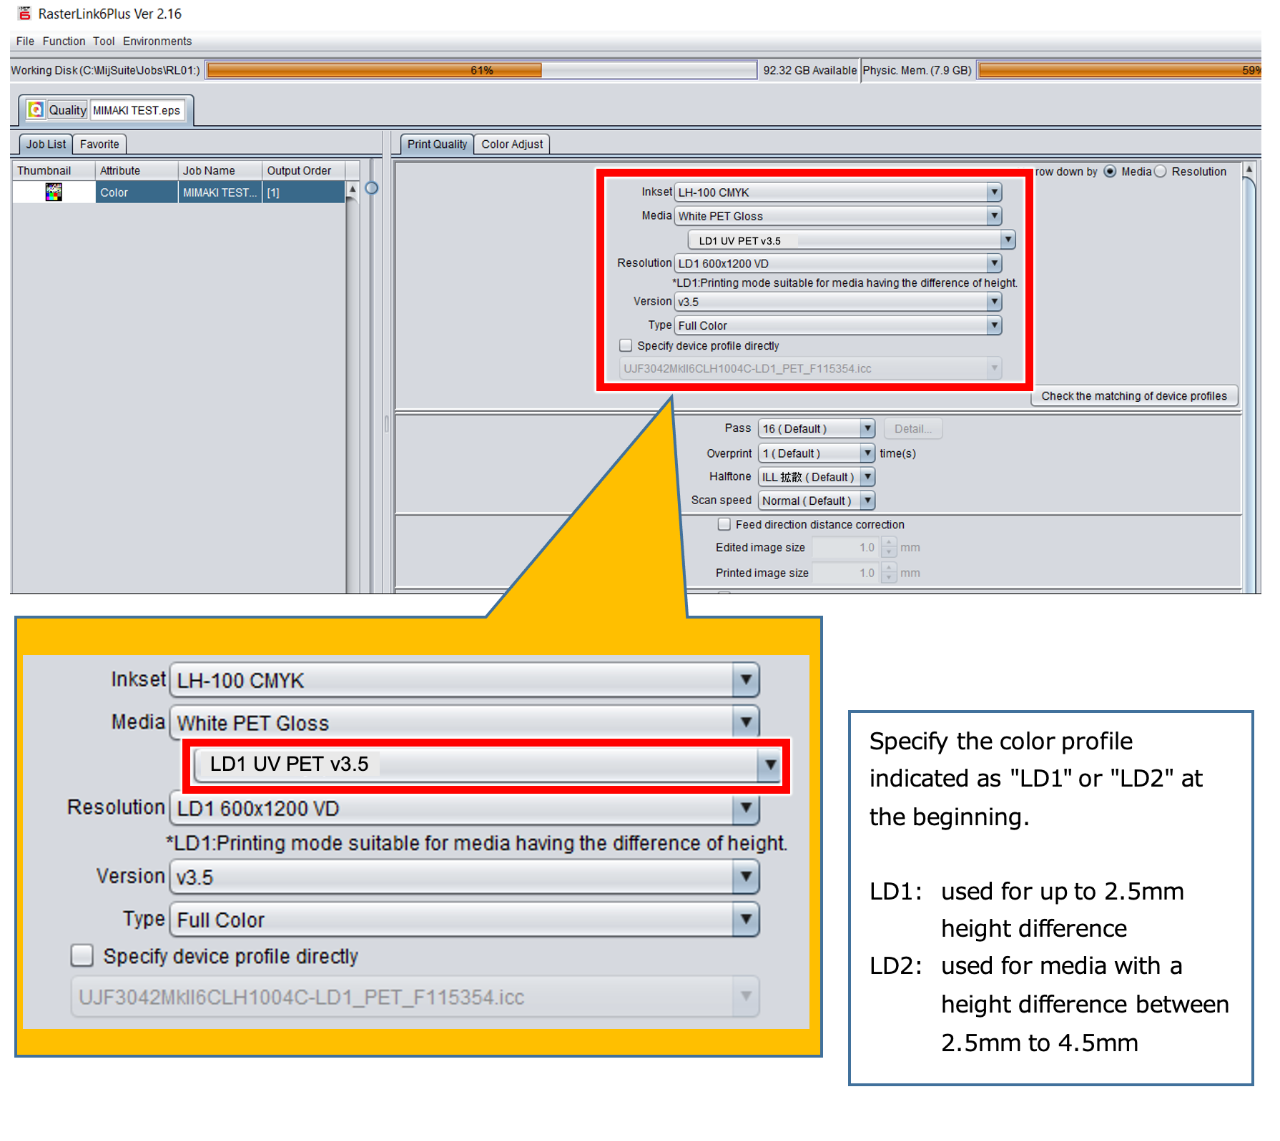
When printing on media with height differences, use [LD mode].
Please use the color profiles labeled "LD1" or "LD2" at the beginning of the media name in the RIP software.
LD1: used for media with a height difference of up to 2.5mm
LD2: used for media with a height difference between 2.5mm to 4.5mm
[RIP print condition settings]


Corrective action 4
You can reduce static electricity generation by slowly removing the protective film form the media.
You can remove static electricity by using an anti-static brush or an ionizer before printing.
If you are experiencing scattering even when using an ionizer, please try cleaning the electrode needle.
Please refer to the "UJF-30_6042MkII series Ionizer Instruction Manual" for handling the ionizer.
* Please note that placing a machine on a carpet or similar surface may increase static
electricity generation
* Please refrain from using an anti-static spray
Low humidity may affect printing by causing unstable firing.
To prevent static electricity, humidify within the recommended range (35 to 65% Rh) using humidifier or similar device.
